iPad Inspired Mouse Pointer on Web with CSS Variables
I remember when iPad first added support for mouse. My first thought was, ”… why?”, but once I saw it in action I was mesmerized by the design. I loved the way that the cursor took the form of a shaded circle instead of the default mouse pointer, and the way the cursor interacted with buttons and links. Ever since then I wanted to create that effect for web using CSS and Javascript. I finally got the chance when coding my new website and it turned out to be pretty easy and very satisfying.
My design was heavily inspired by the functionality of Pavel Laptev’s Context Cursor, but I wanted the challenge of creating this myself, so I kept a blind eye to their source code.
I knew I wanted to accomplish 3 things:
- Replace the default cursor with a translucent circle
- Have that circle resize to highlight clickable areas
- Make is feel good
Getting Started
First thing was to remove the default cursor. This is the easy part. Simply adding cursor: none; to the entire html document took care of that. Easy peasy.
Next was to display the shaded circle. I added a mousemove event listener and updated css variables for the cursor’s coordinates. This worked really well. Here’s what we have so far:

<div id="cursor"></div>html {
cursor: none;
}
#cursor {
position: fixed;
left: var(--cursor-left);
top: var(--cursor-top);
width: 20px;
height: 20px;
margin-left: -10px;
margin-top: -10px;
background: rgba(0, 0, 0, 0.1);
border-radius: 10px;
pointer-events: none;
}addEventListener("mousemove", function (event) {
var documentStyle = document.documentElement.style;
documentStyle.setProperty("--cursor-left", `${left}px`);
documentStyle.setProperty("--cursor-top", `${top}px`);
});Getting Interactive
My main goal was to have the cursor’s position and shape encapsulate whatever you hover on. I added a mousemove event listener to all anchor tags and buttons on the page and updated the --cursor-left and --cursor-top vars. I also set 2 new vars for the target’s width and height.
So far the cursor was centered using a left and top margin of -10px to offset the hard-set width and height of 20px. Also the border radius was set to 50% to make it a perfect circle. In order to have the cursor match the shape of the target, I needed to update the border radius and margin too. I achieved this in one swoop using a new padding var. It’s used to set the cursor’s padding and border radius, and is part of a calculation for the negative margins.
Here’s where we’re at now:
<div id="cursor"></div>

<a href="#">Click Here</a>
<br/ ><br/ >
<button>Submit</button>
<br/ ><br/ >
<a href="#"><img ... /></a>html {
cursor: none;
}
img, a {
display: inline-block;
}
#cursor {
position: fixed;
left: var(--cursor-left);
top: var(--cursor-top);
width: var(--cursor-width);
height: var(--cursor-height);
padding: var(--cursor-padding);
margin-left: calc(var(--cursor-padding) / -1);
margin-top: calc(var(--cursor-padding) / -1);
border-radius: var(--cursor-padding);
background: rgba(0, 0, 0, 0.1);
pointer-events: none;
}addEventListener("mousemove", function (event) {
var documentStyle = document.documentElement.style;
documentStyle.setProperty("--cursor-left", `${left}px`);
documentStyle.setProperty("--cursor-top", `${top}px`);
});
for (var anchor of document.querySelectorAll("a")) {
anchor.addEventListener("mousemove", function (event) {
event.stopPropagation();
var documentStyle = document.documentElement.style;
var rect = event.currentTarget.getBoundingClientRect();
documentStyle.setProperty("--cursor-left", `${rect.left}px`);
documentStyle.setProperty("--cursor-top", `${rect.top}px`);
documentStyle.setProperty("--cursor-width", `${rect.width}px`);
documentStyle.setProperty("--cursor-height", `${rect.height}px`);
documentStyle.setProperty("--cursor-padding", "5px");
});
}This is going really well
OK, so the default cursor is hidden, check. The new cursor follows the mouse, check. The cursor reacts with clickable elements on the page and matches their size and position, check.
Now that the cursor takes the shape of the hover target, I wanted to add transitions between the default state and the hover state. Seems simple enough. I added a catchall CSS transition that will handle changes to the cursor’s left, top, width, height, padding, and border radius. I set the timing function of the transition using a cubic-bezier curve to give it a little elasticity.
I loved the effect of the transitions, but I felt it would work best to have an indicator of the mouse’s actual position too. So I used the :before pseudo class to set another cursor element using the same left and top vars. This one does not resize or transition and disappears when hovering to show the default pointer cursor.
Lastly, a funny effect was happening when scrolling where the cursor’s hover state would stay put but the clickable element would scroll out from under it. To fix this I started tracking the mouse’s position in javascript and shrink and reposition the cursor back to the mouse’s position on scroll.
After some quick cleanup and combining some redundant code into an updateCursorStyle function. We are all set.
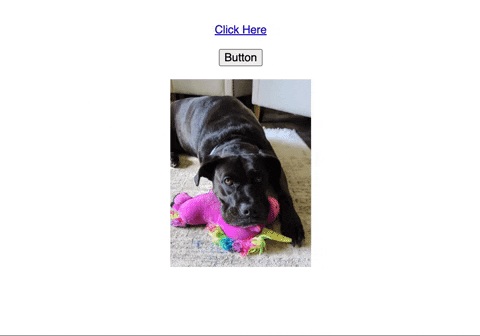
Here’s the final result!

<div id="cursor"></div>

<div style="text-align: center;">
<br/ ><br/ >
<a href="#">Click Here</a>
<br/ ><br/ >
<button>Button</button>
<br/ ><br/ >
<a href="#"><img width="200" src="https://underemployed.engineer/assets/images/20220917.png" /></a>
</div>html {
cursor: none;
}
img, a {
display: inline-block;
}
#cursor {
position: fixed;
left: var(--cursor-left);
top: var(--cursor-top);
width: var(--cursor-width);
height: var(--cursor-height);
padding: var(--cursor-padding);
margin-left: calc(var(--cursor-padding) / -1);
margin-top: calc(var(--cursor-padding) / -1);
border-radius: var(--cursor-padding);
background: rgba(0, 0, 0, 0.1);
pointer-events: none;
transition-duration: 300ms;
transition-timing-function: cubic-bezier(0.175, 1.275, 0.32, 1.275);
}
#cursor::before {
position: fixed;
left: var(--cursor-left);
top: var(--cursor-top);
width: 8px;
height: 8px;
margin-left: -4px;
margin-top: -4px;
border-radius: 50%;
background: #000;
opacity: var(--cursor-inner-opacity);
pointer-events: none;
content: '';
}var mouseX = 0,
mouseY = 0;
addEventListener("mousemove", function (event) {
mouseX = event.clientX;
mouseY = event.clientY;
updateCursorStyle(mouseX, mouseY, 0, 0, 20, false);
});
addEventListener("scroll", function (event) {
updateCursorStyle(mouseX, mouseY, 0, 0, 20, false);
});
for (var anchor of document.querySelectorAll("a, button")) {
anchor.addEventListener("mousemove", function (event) {
event.stopPropagation();
cursorX = event.clientX;
cursorY = event.clientY;
var rect = event.currentTarget.getBoundingClientRect();
updateCursorStyle(rect.left, rect.top, rect.width, rect.height, 5, true);
});
}
function updateCursorStyle(left, top, width, height, padding, hover) {
var documentStyle = document.documentElement.style;
documentStyle.setProperty("--cursor-left", `${left}px`);
documentStyle.setProperty("--cursor-top", `${top}px`);
documentStyle.setProperty("--cursor-width", `${width}px`);
documentStyle.setProperty("--cursor-height", `${height}px`);
documentStyle.setProperty("--cursor-padding", `${padding}px`);
documentStyle.setProperty("--cursor-inner-opacity", hover ? 0 : 1);
}A Good Starting Point
This ended up being a really simple and fun proof of concept. It’s a great jumping off point if you wanted to create a similar effect yourself. To be honest I tweaked this a bit more before including in on my site, and I’ll probably continue to tweak it in the future.
I encourage you to try making this effect yourself, or take a copy of it and customize it to fit your needs. I really enjoyed working on it and love the end result.
You can check out the CodePen for this exercise here iPad Style Mouse Pointer on Web with CSS Variables